Each student and staff member in the school district is assigned an individual account to track purchases and payments. This is where you can view, edit or add new accounts.
With Initial Account Setup, you can add individual accounts using this option, or you can use Import Students (under System Management: Administration) to import student accounts from an external student management database.
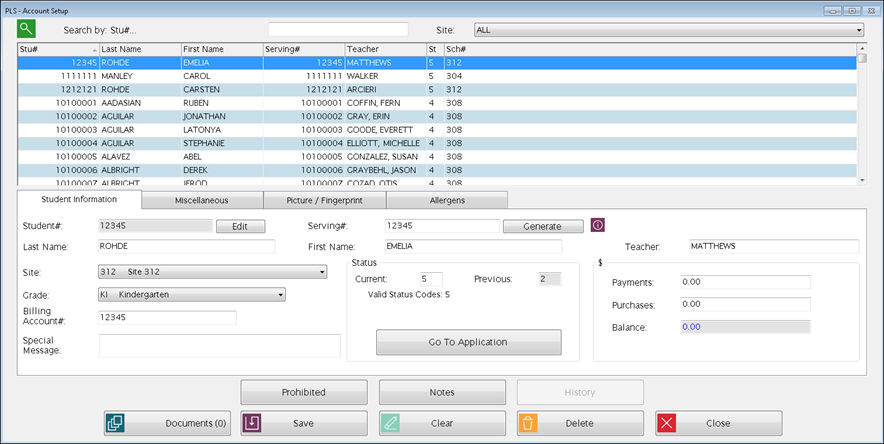
Start with a clear screen and enter the Student#. Fill in the rest of the fields as shown below.
Select the Site you want to work with from the dropdown list at the top. (If you only have access to one site, it is pre-selected automatically.) A list of students will display in the grid at the top.
The account information is shown on three tabs:
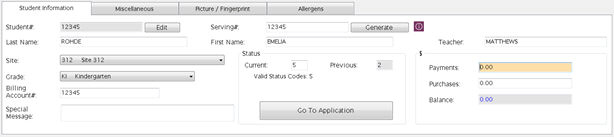
Each account can have two different ID numbers in POS:Student number and Serving number.
Student# is the main ID number that is used to identify a student throughout all the Meals Plus products. It is usually assigned by the school district or state agency. This is required for all accounts and must be unique. It must be numeric and 3-12 digits.
Serving# (PIN) should be the same as the Student # or it can be a shorter number that is assigned for serving meals in the cafeteria. It must be numeric, at least 3 digits and unique for each student. You can use the Generate button if you want the system to assign a Serving#.
When an ID number is entered on the serving screens, it searches on Serving# first, then on Student#.
Student#
This is a required field for every account and must be unique within the district.
The Student# will display in the text field. If you need to change an existing student number, click Edit.
Enter the new number that you want to assign and click Save.
If the number is available it will be assigned to this student for both Meals Plus POS and Student Eligibility.
If you get a message that it has already been used, you will need to assign a different number.
Serving#
You can use the Student number here or assign a different Serving number.
If you want the system to assign a serving number, click Generate.
Last Name / First Name
The last and first names are required (up to 20 characters each).
Teacher
You can enter the teacher’s name or homeroom number here.
Unique teacher names within the district are recommended. You can include first name, initial, etc., if there are duplicate teacher names.
Site
Select the assigned school. A valid school number is required for each student or adult account.
If a student transfers to another school, change the Site on this screen. You must have security rights to both sites. If there is a balance on the account, an adjustment transaction will be written to show that the balance was transferred.
If a student withdraws, change the Current Status to 5. Any existing balances will remain on the account at the site they withdrew from.
Grade
Select the grade from the Grade dropdown list. This defaults to 00 if nothing is selected.
Billing Account#
This is the billing number for this account. Usually it is the same as the Student #, but you can set up special billing accounts for catering or for families where students at the same school can share payments. Please see Billing Accounts.
Special Message
Enter and save special messages for students here. This allows up to 50 characters and will appear when the student is being served.
 Confirm Special Message
If you check the Confirm Special Message box in the Control File, cashiers will have to confirm any special messages as students are served.
Status: Current
This shows the current status for this account.
Numeric status codes are used for confidentiality. The status codes used in all Meals Plus products are:
2 = Free Student
3 = Reduced Student
4 = Paying Student
5 = Withdrawn Student
6 = Teacher
7 = Adult
8 = School Food Service Employee
9 = Catered
Click the Go To Application button to view the selected student’s application.
o This allows the user to easily view a student’s Student Eligibility application from Point of Sale.
o The button is only active if the student selected has an application.
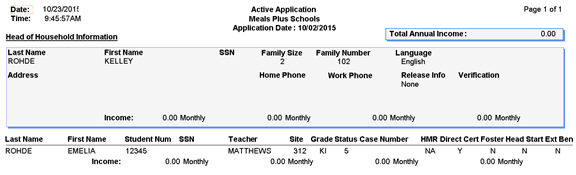
§ The student’s application (from Student Eligibility) opens in Point of Sale.
§ If the user does not have security rights for STU: Manage Applications, a message will display and the user cannot view the application.
§ The user can make changes to the application here. POS: Account Setup will be updated once the user saves and closes the application window.
You must have security rights to Allow Changing Status (under Preferences) to make any changes here.
If you are using Meals Plus Student Eligibility, you can only change a status to 2 (free) or 3 (reduced) if it is before the Meal Benefit Expiration date for the student's site.
After the Meal Benefit Expiration date, any status changes for free and reduced students must be done through the Student Eligibility program. This is necessary to protect your free and reduced data for auditing purposes.
If a student has an application on file, the status can only be changed to 5 (withdrawn) from Point of Sale. If they re-enroll, you will need to reprocess their application in Student Eligibility.
If you are adding a new account in POS, it can only be given a status of 4 (paying student) or higher. New students who qualify for free or reduced will need to be evaluated in Student Eligibility.
Please refer to Student Eligibility documentation for more information on Meal Benefit Expiration dates.
This is updated automatically whenever a status is changed.
If this is checked, it is a temporary status.
If there is a status change pending on this account, it will show the future status and date here. Otherwise, it will show when this status became effective.
This is a running total of all payments for this account. You must have security rights to Allow Changing Balance (under Preferences) to make changes here.
Changes made here will NOT show on Daily Deposit.
This is a running total of all purchases for this account. You must have security rights to Allow Changing Balance (under Preferences) to make changes here.
Changes made here will NOT show on Daily Deposit.
This displays the account balance based on the transactions entered for this account.
On this screen, the balance can only be changed by changing Payments or Purchases. You must have POS security rights to Allow Changing Balance (under Preferences) to make any changes here.
Payments/Purchases cannot be changed if the Site is also being changed. In that case, you would need to make two separate changes to the account.
 If you change
a balance here, it will NOT affect the day’s cash reports (Meal Summary
and Daily Deposit), but there will be a balance change record in theTransaction
Historyunder
Adjustments.
If you change
a balance here, it will NOT affect the day’s cash reports (Meal Summary
and Daily Deposit), but there will be a balance change record in theTransaction
Historyunder
Adjustments.
This information is used for student bills and letters.
Enter the parent’s email address here.
This information is used for student bills and letters.
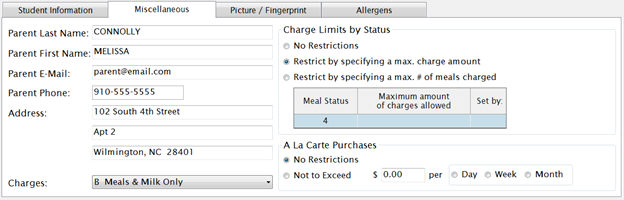
Parent
Name and AddressInformation on this screen is for POS only. It does not update the Head of Household Name and Address in Student Eligibility.
Select the charging status for this account. This controls what the student can charge.
o Y = Allow charges. It will give a message if the charge balance goes over the site limit.
o M = Meals only. Charges for supplemental sales (including milk) will not be allowed. It will give a message for type 1 meals if the charge balance goes over the site limit.
o K = Milk Only (one milk charge per student for a serving session)
o B = Both Meal and Milk (one meal charge and one milk charge per student for a serving session)
o N = No charges are allowed.
This controls how much the student is allowed to charge. The limit can be based on the dollar amount or the number of meals. You can use the site-based limits or customize individual accounts.

If the account has customized settings, you will see Set by: Student here. It will say Set by: Site if it is using the default setting.
If an account’s Site changes they will keep any custom settings.
If an account’s Status is changed (from any source, not just account setup), any customized settings will be cleared and the account will be set back to the site default settings.
You can set a daily, weekly, or monthly limit for A La Carte purchases.
o This is for all A La Carte purchases, not just charges.
o A La Carte refers to anything that does not have nutrition code 1 (type 1 meal).
o Weekly is Sunday to Saturday. Monthly is the current calendar month.
o If you select Not to Exceed and leave the amount set to zero, all A La Carte sales will be prohibited.
A La Carte Settings with Transfers
If a student’s A La Carte settings have not been customized on this screen, and they are transferred to a new site, they will get the new site’s default settings. Customized settings will not be changed if the student is transferred.
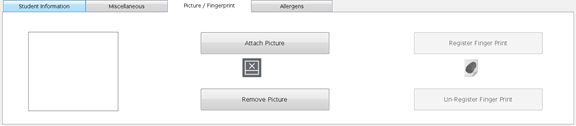
This is where you can attach a picture to a student’s accounts. It will show on the serving screen. Pictures can be jpg or bitmap format. The maximum file size is 100kb.
Click on Attach Picture and browse to the location where the image is stored; click Open.
You can also use the Import Pictures Utility if you want to attach a group of pictures all at once.
The allergens tab is used to assign allergens to students.
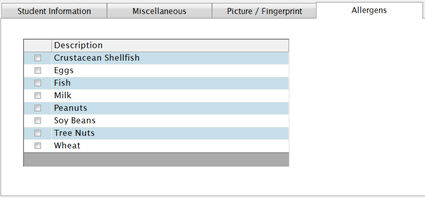
Check the box next to any allergens that apply to the student selected in the upper grid. To add additional allergens, please see Administration: Allergen Setup.
Click the  button to prohibit sales of
specific items to a student by checking the boxes here.
button to prohibit sales of
specific items to a student by checking the boxes here.
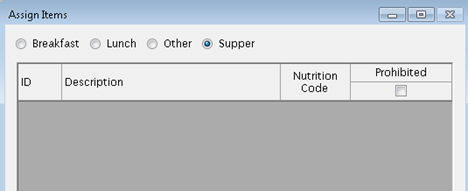
Click Save when completed.
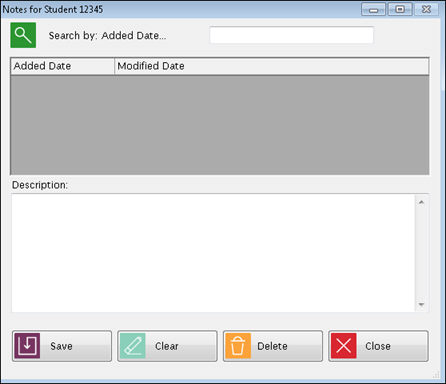
Click
the  button
to record detailed notes
about a student.
button
to record detailed notes
about a student.
o This information does not show on serving screens.
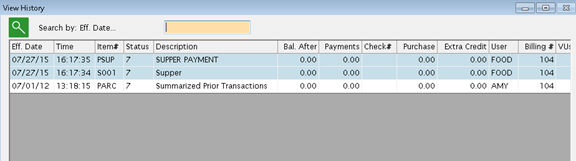
Click
the  button
to view the student’s transaction history.
button
to view the student’s transaction history.
o The most recent transactions are at the top.
o Color highlighting indicates which rows belong together as a single transaction.
o Voided transactions are shown in red font.
Document Cabinet allows the user to add documents to a vendor.
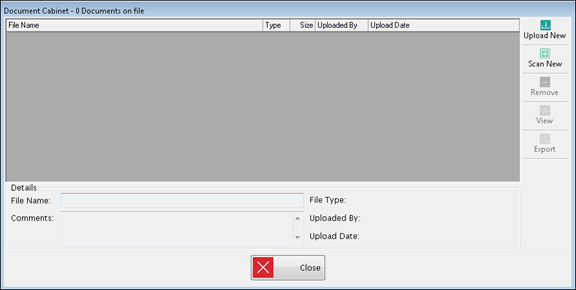
Upper Grid
This displays all the documents currently attached to this record.
Select any record to display more details below. Any comments along with whom and when the document was added to this record will display.
Buttons
Click Upload New to add a new document that has been saved on your computer.
o File Namecan be changed and Comments added as needed.
Click Scan New to scan and add a new document directly to this record.
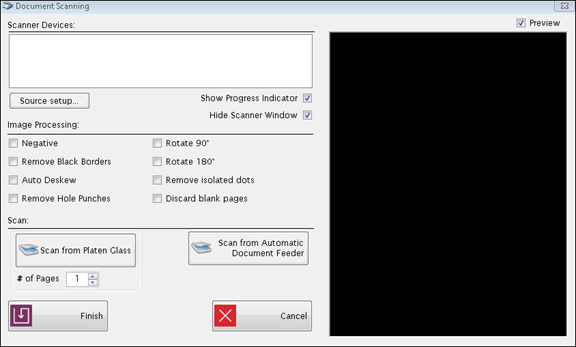
o Select a scanner from the list of available scanners in the top box.
o Uncheck the Hide Scanner Window box to see more advance options for your scanner.
o Use the options in Image Processing to adjust the quality of the scan.
o Click Scan from Platen Glass or Scan from Automatic Document Feeder depending on the type of scanner you are using. When the scan is complete, a preview of the document will show on the right side.
o Click Finish when you are ready to attach the scanned document. The document will be saved in the document cabinet as a PDF.
To remove a document, highlight the document in the grid and click Remove.
Click View to view an existing document. The document will open in Read Only status.
Click Export to export a document out of ISIS. Abrowse box to select where to save the document will appear. Choose location to export the document and Save.
Details Section
This section displays the File Name and type, when it was uploaded and by whom.
Enter any comments about the document in the Comments text box.
The  button is to be used only
for correcting errors such as duplicates. It should not be used
for withdrawing students.
button is to be used only
for correcting errors such as duplicates. It should not be used
for withdrawing students. 
o It will set the status to 0 and remove it from Account Setup and Serving screens. Any existing balance will be adjusted to zero.
 Why not use the Delete
button students who withdraw?
Why not use the Delete
button students who withdraw?
If a student withdraws during the school year, just change the status to 5 (withdrawn). They should not be deleted.
Withdrawn students’ history will still be available for reports.
If they had a balance, it will remain on their account. If they pay off a charge or get a refund it can be processed through the serving screen.
If they had an approved application and return during this school year they can keep their free/reduced status.
They will be deleted automatically when you run Close School Year.
Deleted
accounts are not accessible in account setup or serving screens.
Any existing balances will be set to zero.
If they were approved for free/reduced and return during this school year, the application will need to be reprocessed.
Deleted students will be disassociated from any billing accounts.
If you need to re-activate a deleted account, use Re-Enroll Students. If a deleted free/reduced student is re-enrolled, the application will need to be reprocessed.
Some account numbers have been reserved for special use as GenericAccounts. They can be used when an individual account number has not been set up.
Generic Accounts can be used more than once during a serving session, but charges and prepayments are not allowed. The account numbers reserved for generic accounts cannot be assigned to individual accounts.
These account numbers correspond to the account Status Codes as follows:
ACCT# NAME
200 Status 2 Student (Free)
300 Status 3 Student (Reduced)
400 Status 4 Student (Full Pay)
600 Status 6 Teacher Account
700 Status 7 Adult Account
800 Status 8 SFS Employee
900 Status 9 Catered Account
You can also enter just the first digit of a generic account (2, 3, 4, etc.) for quick data entry on the serving screens.
The generic student accounts will display only the status codes (without any Free/Reduced/Full Pay references) on the serving screens. This is done to ensure confidentiality.
You can set up special billing accounts for catering or for families where students at the same school can share payments. A billing account can also accommodate additional students from other sites in addition to the site the billing account is assigned.
With Billing Accounts, the individual students’ purchases are still associated with the student’s own account and status code. But all charges and payments go to the billing account.
It must be status 9.
It must use its own Student# as Billing Account#.
You cannot change the Billing Account#, Status or Site if other accounts are attached.
The Billing Account# must be a valid status 9 account (not 900), but the Site can be differ between the billing account and student account.
You cannot change the Site on an account that is currently billed to another account. You must change the Billing Account# back to the student’s own account number before changing the student’s site.
 How to set up billing accounts
Set up the billing account first. You can assign any number as the Student# but the status must be 9.
Balances on the students’ accounts must be zero before they can be attached to billing accounts. (You may need to do account adjustments to change student accounts to zero and put the balance on the billing account.)
Assign the students’ accounts to the billing account it by entering the billing account number on the student account.
© 2018 EMS LINQ, Inc.
POS+, revised 03/2018