User Group Setup
This is where you create and modify User
Groups.
Purpose
A User Group provides a security template that you
can use for multiple users. This
makes it easier to manage security since you do not have to do a line-by-line
security setup for every user.
- If you need to make changes to an entire group of users, you can do it easily under User Group Setup.
- When you add a new user, just assign them to the appropriate User Group for their job.
- If a user’s responsibilities increase, just re-assign them to a group with more rights.
User Group Setup
You can have any number of groups, depending on the
levels of security required: Administrator, Supervisor, Manager,
Cashier, etc.
- Administrator is the only group that can access System Management.
- This includes Security (add/delete Users or User Groups, change User Group assignments), and Auto Update settings.
- This group is required and there must always be least one user in it.
- The first user that logs in will always be set up as an administrator. You can assign additional users to this group if you want to.
- Other user groups can be set up as needed. Several sample groups are provided on installation, but it is recommended you customize them to meet local needs.
- Suggestions for User group rights:
- POS Cashier would usually just need rights for serving on today’s date and running basic reports.
- Manager could also have rights to change account balances, serve on a different date and run additional reports.
- Supervisor could also be allowed to unclose a day or void other users’ transactions.
For more details on POS and Student Eligibility Security Settings, please see POS Security Settings and Student Eligibility Security Settings.

-
Enter
a Description in the
Description field or
highlight an existing User
Group to change the existing description.
-
Click
Save to apply the changes
or Close to exit the
screen.. The User Group
Setup form will reopen.
-
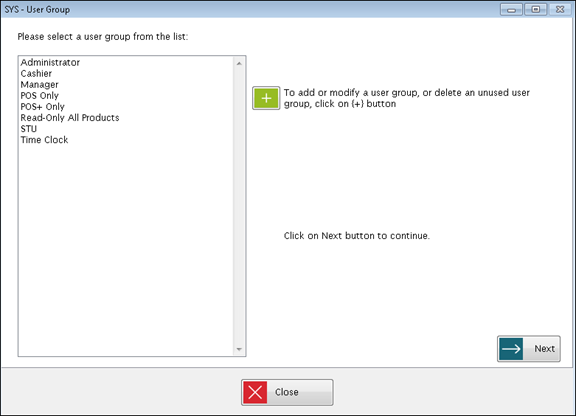
From the User Group Setup screen, select
a User Group from the
field on the left and click Next.
The form to assign user group roles will appear.

Left Grid
-
Check
the Process and/or Read (where available) boxes
to for Functions allowed
under this Role.
Process allows the user full access to the option (Add, Change, or Delete). Read rights only give the user the ability to view the information under the option. Users with Read only rights will not be allowed to make edits. When a Process rights are granted, Read rights are automatically granted also. If the Read section is greyed out, that means view only rights are not allowed within that menu option.
Right Grid

-
Click
Save to save the changes.
-
Click
Back to go back to the previous form without saving changes.
-
Click
Close to close out of
User Group Setup.
 Shortcut
for setting up multiple user groups:
Shortcut
for setting up multiple user groups:
You can use an existing group as a starting point
for updating other groups.
Example: You have set
up a new group called Managers
and need to assign security rights. Administrator
is already set up with all rights checked.
POINT OF SALE SECURITY SETTINGS
The POS security settings
are designed to preserve data integrity for users who are handling money
transactions but allow flexibility for advanced and trusted users.
Below is a description of the various settings with some recommendations
about which users should have them.
Preferences
have detailed settings that control user permissions in the serving and
account setup screens. Consider your audit requirements and local
policies when deciding who should have these additional rights.
Administration has checkboxes for Read (view only) and Process (save changes).
- Usually only a few advanced users would need Process rights for Administration options.
- Read rights should be given to users who need to see these screens but would not need to save changes (except on fingerprint registration; see above).
- Serve and Reports options all correspond to the menu options shown at the top of the screen.
- POS Cashiers would all need rights to Serve and possibly to print some Reports but other rights would usually be limited based on experience level.
Utilitiesincludes various procedures that are used infrequently.
- Letter Setup—if checked, this controls access to formatting of the POS bill and low balance letters. (Recommend for experienced users only.)
- Change Serving#/Status/Balance—if checked, this allows a user to change student balances and statuses. (Recommended for trusted/experienced users only.)
- Change Password—if checked, this allows the user to change their own password. (Recommended for all users.)
- Port Settings—if checked, this controls the keypad/scanner settings. (Recommend for experienced users only.)
- Import Pictures—if checked, this allows the user to import pictures for student accounts. (Recommend for experienced users only.)
- Unclose Day—if checked, this allows a user to unclose a day so changes can be made. (Recommended for trusted/experienced users only.) Export Totals—if checked, this allows a user to export POS data. (Recommend for experienced users only.)
- Reprocess Transactions—if checked, this allows a user to reprocess transactions if a student’s Free and Reduced status changes after meals were purchased. This is a very powerful option intended for limited use. (Recommended for advanced users only.)
- Zero Negative Balance—if checked, this allows the user to update all accounts that have a negative balance and offset the balance to zero.
- Custom Query—if checked, this allows the user to create and run a query specific to their needs.
- Reverse Transactions—if checked, this allows the user to reverse a transaction without having to void (reverse) all the transactions that followed the original transaction.
STUDENT ELIGIBILITY SECURITY SETTINGS
Preferences has detailed settings that are used with Verification, documents and emailing Letters.
- Verification Summary Reports—if checked, this allows a user to view and print the verification summary reports.
- Restart Verification—if checked, this allows the user to start over, if the selection letters have not been printed.
- Special Verification (checkbox on the Head of Household Screen)—if checked, this allows you to exclude a household from verification. Usually this would be limited to the same users who have rights to run verification.
-
Verification Selection Reports—if checked, this allows a user to view and print the verification selection reports.
- Add/Remove Documents—if checked, the user is allowed to add and/or remove documents to the Document Cabinet, where available.
-
Allow Past Effective Date—if checked, the user can set an Effective Date that is prior to today's date.
- Email Letters—if checked, users can sent account-related letters to parents via email instead of printing and mailing them.
Administration has Read (view only) and Process (save changes) checkboxes.
- Usually only a few experienced users would need Process rights for Administration options.
- Others may be given Read rights if they need to see the information.
Processing, Letters, and Reports
- These are all used in the day-to-day processing of applications.
- Users who enter Free and Reduced applications will need rights to Processing, and to the Letters and Reports they are responsible for.
Verification
This is usually limited to just a few experienced users.
- Usually the user who is responsible for verification would have rights to all the verification options.
- Other users could be given rights to reports or other features they may need.
Utilities
- Print Mailing Labels—if checked, this allows users to print mailing labels for letters; this could be done by the users who print notification letters.
- Direct Certification—if checked, this allows the user to import a Direct Certification student file. This is usually reserved for more experienced users.
- Import From LunchApplication.com—if checked, this allows the user to import student applications completed on LunchApplication.com. This is usually reserved for more experienced users.
- Custom Query—if checked, this allows the user to create and run a query specific to their needs.
- NC Administrative Review Export—if checked, this allows the user to create an Administrative Review file based on the specifications provided by NCDPI. This is for North Carolina users only.
- FL Master Roster Export—if checked, this allows the user to create an export of student data. This is for Florida users only.
MENUS SECURITY SETTINGS
Preferences has detailed settings that are used with productions reports, recipes and documents.
INVENTORY SECURITY SETTINGS
PRODUCTION SECURITY SETTINGS
Preferences has detailed settings that are used with productions reports.
- Unclose Production Record—if checked, this allows the user to unclose a previously closed production record.
- Allow Modify Production Column 8—if checked, this allows the user to modify Column 8 of the Production Report.
FINANCIAL SECURITY SETTINGS
Preference has a detailed setting that is used with deleted accounts.
- Allow Delete Accounts—if checked, this allows the user to delete all accounts for a fiscal year under Utilities.
TIME CLOCK SECURITY SETTINGS
Preference has detailed settings that are used with employee accounts.
- Clear PIN—if checked, this allows an administrator to clear an employee’s PIN so it can be reset.
- Undo Approval—if checked, this allows an administrator to undo an approval that has previously been made (i.e. leave, day clock in/out).
POS+ SECURITY SETTINGS
- Change Serving Date—if checked, the user can change the serving date on the screen. If un-checked, the user can only serve using the current system date.
- (This setting should be reserved for trusted/experienced users. If a user is allowed to change the serving date, it means that money transactions can be entered that will not show up on today’s deposit report, which may make it more difficult to audit.)
- Void Other Cashiers’ Transactions—if checked, the user can void transactions entered by other cashiers as well as their own transactions. (Recommended for trusted/experienced users only.)
- Void Own Transactions—if checked, the user can void transactions they entered themselves. If unchecked, the void button is disabled.
- Allow Serving Visiting Students—if checked, the user can serve students that are assigned to any school in the district.
- If unchecked, the user can only serve to students assigned to the Serving Site that is selected on the serving screen, or a secondary site that is associated with that site.
- Allow Changing Status—if checked, the user can change student statuses if they also have Process rights to Account Setup. (Recommended for trusted/experienced users only.)
- Allow Changing Balance—if checked, the user can change student balances if they also have Process rights to Account Setup. (Recommended for trusted/experienced users only.)
- Allow Override Charge Limits—this allows a user to override the site’s maximum charges limit on the serving screens.
- Allow Fingerprint Registration—this allows a user who has Read rights to Account Setup to register fingerprints in POS: Account Setup.
- Enable Print Receipt Button—if checked, a Print Receipt button will display on the Serve screen, allowing cashiers to print receipts.
- Auto Serve—if checked, the user is allowed to serve an Auto Serve item.
- Allow Modify Meal Summary—if checked, the user is allowed to modify a day’s meal summary under Serving Report: Meal Summary.
- Enable $100 Button—if checked, a $100 button will display on the Serve screen, allowing cashiers to accept $100 bills.
- Display Remaining Meals—if checked, cashiers will be able to see how many remaining meals a student has when their account information displays on the Serve screen.
- Modify Base Rates—if checked, the user is allowed to change Base Rates associated with CEP and Provision 2.
- Add/Remove Documents—if checked, this allows the user to add and/or remove documents to the Document Cabinet, where available.
- Serve Visiting Student by ID—if checked, cashiers will be able to enter a Visiting Student’s student ID number in the ID field on the Serve screen to bring up their account information and serve the student quicker.
- Use Credit Cards—if checked, a Credit Card button will display on the Serve screen, allowing cashiers to accept credit cards in the lunch line.
©2019
EMS LINQ, Inc.
www.mealsplus.com
SYS Version 9,
revised 11/2018