 New Users: Please see Suggestions
for Setting Up Inventory Items for information on how to design a
new item file.
New Users: Please see Suggestions
for Setting Up Inventory Items for information on how to design a
new item file. This is the section where you define and manage the items you use in inventory.
New Users: Please see Suggestions
for Setting Up Inventory Items for information on how to design a
new item file.
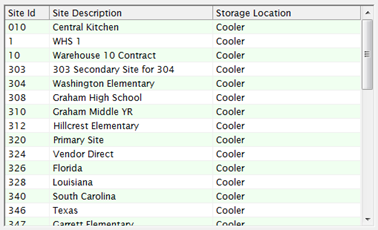
This displays an overview of items. To get to the details, click View/Edit.
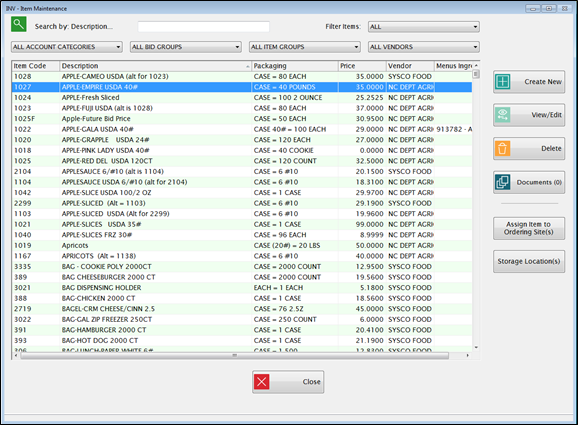
Highlight any column heading in the upper grid to Search by: that column.
The prices, packaging and vendor information are all listed by Bid Dates.
 Filters
and Searching
Filters
and Searching
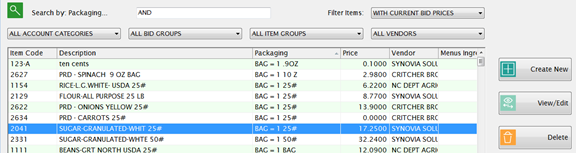
Did you know that when
you set a Filter type (Description, Packaging, Price, etc.), select an
item, click View/Edit and
then return to the main screen by clicking
 ,
your previous filter and item remains selected?
,
your previous filter and item remains selected?
Click  to create a new item. See
How to Set Up a New item
to create a new item. See
How to Set Up a New item
Highlight
a row and click  to
view or edit an existing item in the grid.
to
view or edit an existing item in the grid.
Highlight
a row and click  to
delete an inventory item.
to
delete an inventory item.
Click
the  button to attach documents to a record. Please see Document Cabinet
for complete instructions.
button to attach documents to a record. Please see Document Cabinet
for complete instructions.
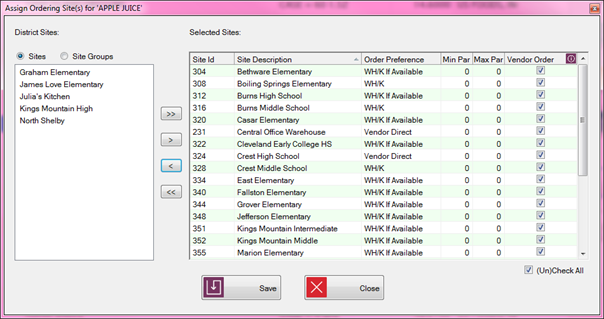
Highlight a row and click  to manage the sites’ ordering rights for this item.

 The single arrows move a highlighted site to the left or right.

 The double arrows move all sites to the left or right.
DISTRICT SITES LIST
This section can be filtered by Site or Site Groups to make assigning items easier.
The sites that are currently allowed to order this item are listed here.
Example: To assign an item to all elementary schools, all you need to do is click Site Groups, select Elementary Schools and then click the single right arrow to move that site group to the Selected Sites grid. All elementary schools will be able to order the selected item. Remember to save any changes.
SELECTED SITES GRID
The grid displays Site Id, Site Description, Order Preference, Min Par Level, Max Par Level, and Vendor Order checkbox.
The sites that are not permitted to order this item are listed here.
Par Levels
Setting a minimum and maximum level for the Par Levels will automatically generate an order when an item reaches the min. level to meet the max. level.
These levels are Primary Units only.
Only the user with access to the site, and permission to order the item can set the Par levels.
Sites that have an Order Preference of Vendor Only cannot edit Vendor Order access.
Unchecking the box will restrict the item from being ordered from the vendor.
Only items assigned to the site are available to allowed or restricted.
Click the (Un)Check All box to select (or de-select) Vendor Order boxes for all the sites in the Selected Sites grid.
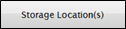 to manage the sites’ ordering rights for this item. You can also use Utilities: Assign Storage Location to set the storage location for multiple sites/site group and inventory items at once.
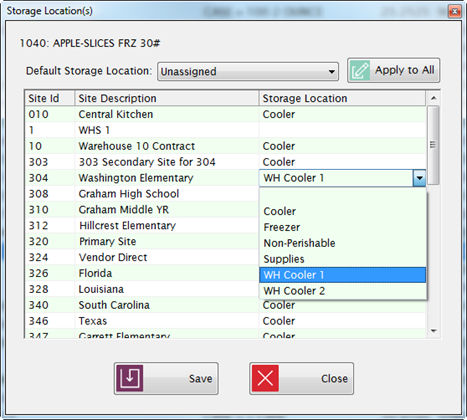
NOTE: A site can have a location assigned for an item, and the site is not able to order it. This is by design because a site can be set up to have an item transferred instead of having it ordered.
APPLYING ONE STORAGE LOCATION TO ALL SITES
 to apply/display that storage location to all of the sites in the grid. It will automatically set all sites to the same Storage Location.

In some cases, an outside vendor provides warehouse storage and delivery services for the district.
The district actually owns the inventory but it is stored at a 3rd party warehouse.
The vendor charges a handling fee for warehouse deliveries.
The Handling Fee is entered under the Items’ bid price settings.
Handling fees apply only when the inventory is shipped to the schools using Warehouse Orders done through the regular ordering process.
Handling fees are not applied if the inventory is transferred from site to site without Warehouse Orders.
Warehouse Orders for item with handling fees will also create Purchase Orders for the fees that will update the GL the same as Vendor POs.
The Vendor for Handling Fee Purchase Orders is selected under Site Setup for the Warehouse/Kitchen Site.
The Expense Account code for Handling Fee POs is set up under Inventory Accounts: Handling Fee.